CCleaner is a powerful and easy to use utility that cleans and optimizes your PC to ensure best performance. The exclude feature in CCleaner can help you to to remove a specific file from the program’s operations. And then once a file has been removed, it is no longer scanned or cleaned by CCleaner. This will save a lot of time and protect the useful folders, files, registry keys and entire drives from being scanned.
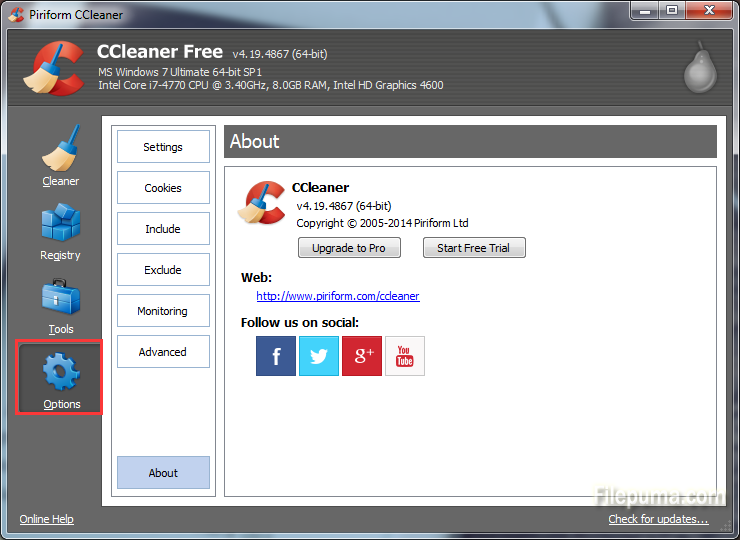
1. Click the “Options” icon on the left side of main CCleaner window.
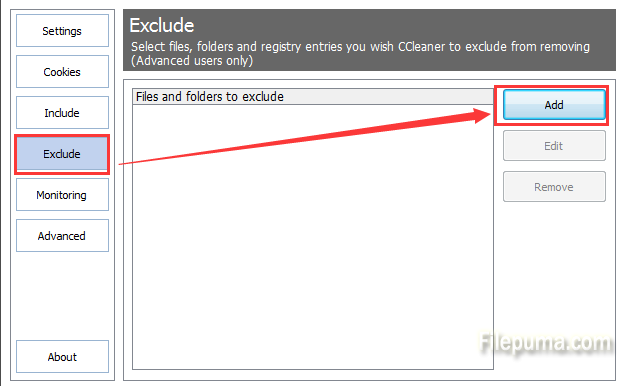
2. Click the “Exclude” button. This zone is used to select files, folders and registery entries you wish CCleaner to exclude from removing.
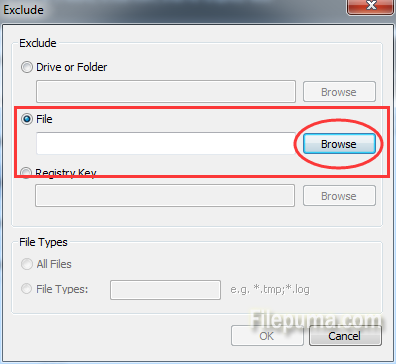
3. Click “Add” to launch the Exclude dialog, click the “File” button, browse to the file you want to remove from CCleaner operations by clicking the “Browse” button.
4. Click “OK” to finish creating your new exclusion rule. The selected file will not be scanned the next time you run a CCleaner operation.
Leave a Reply