Do you still remember the cute and expressive bubbles appear in comics? Do you want to enhance a picture or drawing by adding such speech bubbles? This article will show you through adding speech bubbles to images.
Step One: Download IrfanView and install it on your computer.  Step Two: Open the image you want to edit by clicking “File—Open”.
 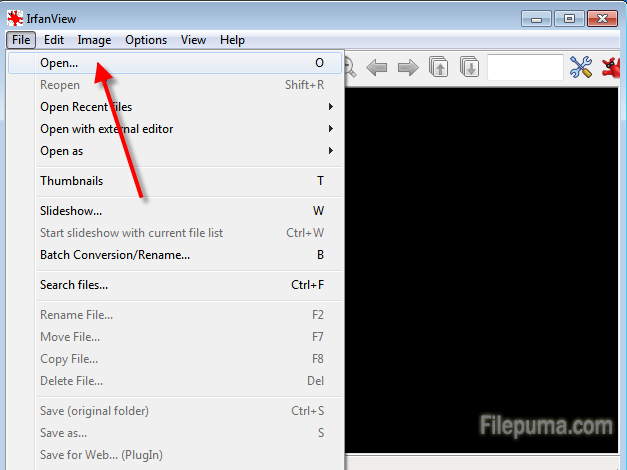 Step Three: Visit such websites to find some nice bubble/balloon images and save them as transparent PNGs. Click “Edit ” and then select “Insert overlay/watermark image”.
 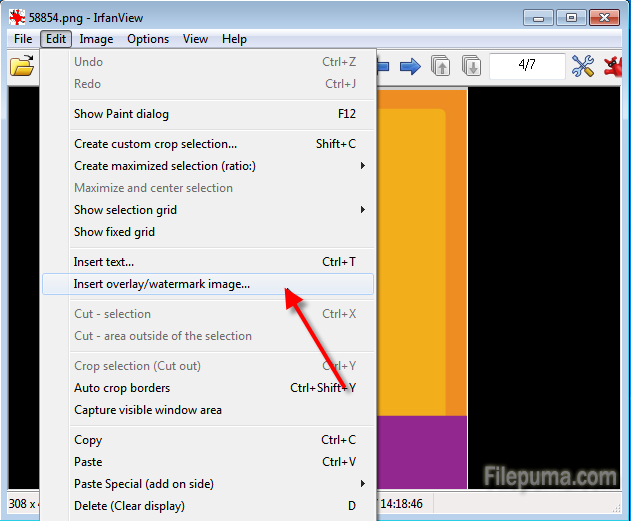 Step Four: In the pop-up window, choose the speech bubble you want to add and select the position, overlay transparency. Click “OK” to apply the editing.
 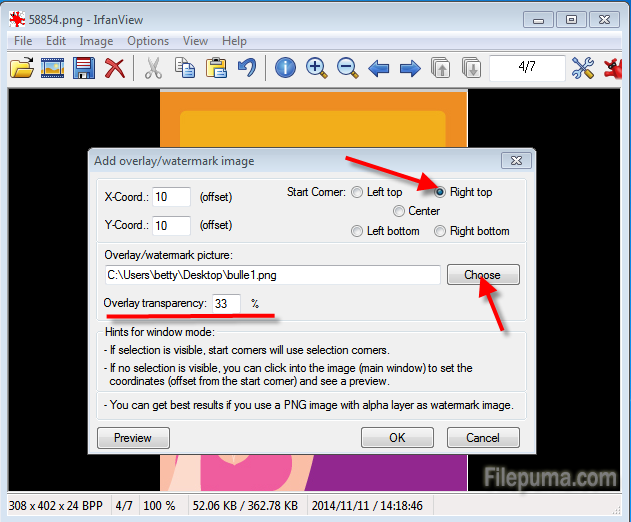 Step Five: Select the inside of the balloon area and insert text into the balloon.
