Sometimes, after you install an update or download something “funny”, there’s a risk that your system will start to run extremely slow or even malfunction. Viruses can do that too and when all fails, you think of reinstalling the system. Well, there is another solution before that tedious and time consuming task: System Restore, a Windows tool that saved me a couple of times. The application simply restores your system to a previous software configuration. It’s like a time machine. Warning! It doesn’t work every single time. At the end of the process you might get the message that the system could not be restored but then you can choose another restore point.
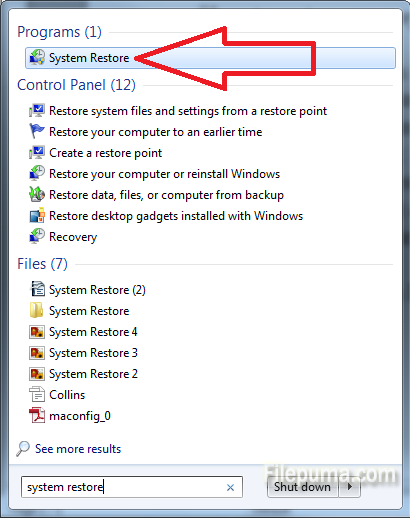
Step 1: Open System Restore by clicking on the Start button and typing “system restore” in the search field below. The tool should be the first result. You can also find it in Start>All Programs>Accessories>System Tools>System Restore.
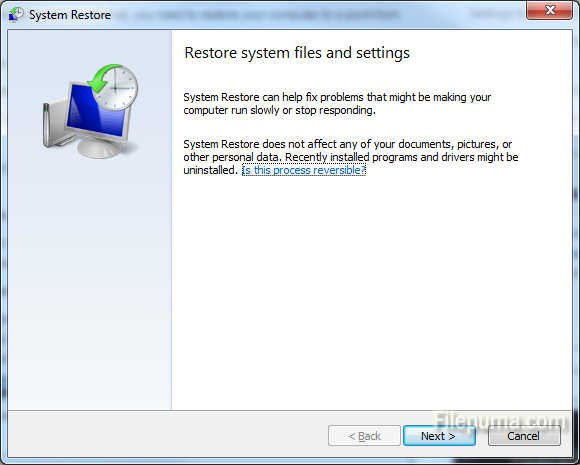
Step 2: You will get a new window that instructs you with what System Restore is all about in a few words. The key thing you need to remember is that System Restore does not affect any of your documents, photos and personal data but it does tell you that the programs you installed recently might be uninstalled. Click the Next button.
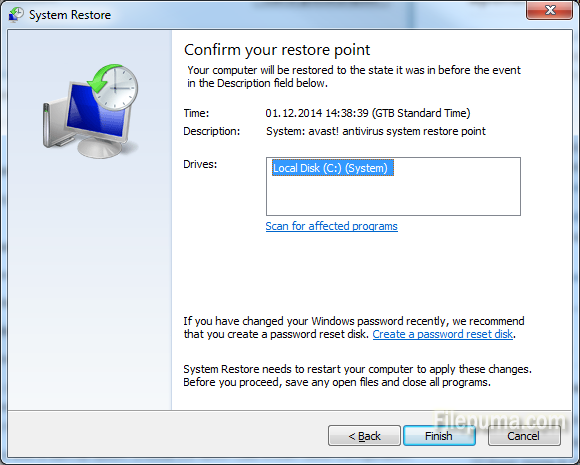
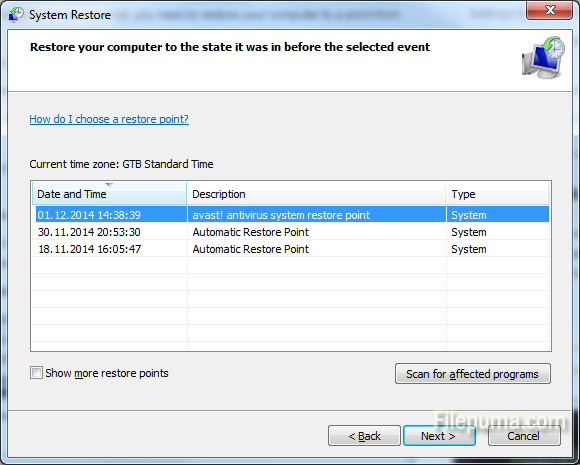
Step 3: Select the restore point. The most recent one will be highlighted but that doesn’t mean you can’t select an earlier one. Obviously have to select the one that takes you back in time before whatever made your computer work like a wood chipper.
Step 4: Next, you have to select the drive you installed the system on. Usually it’s the C:. Then click on finish and then YES, to restart the computer. Good luck!