When you have tens of gigs of photos in the Pictures library it’s hard to keep track of specific things like: how can I find photos with aunt Jane or where are those photos where we fooled around wearing fake mustaches? Things are a lot easier if you tag the images right after you copy them in your computer and it’s pretty easy to do that.
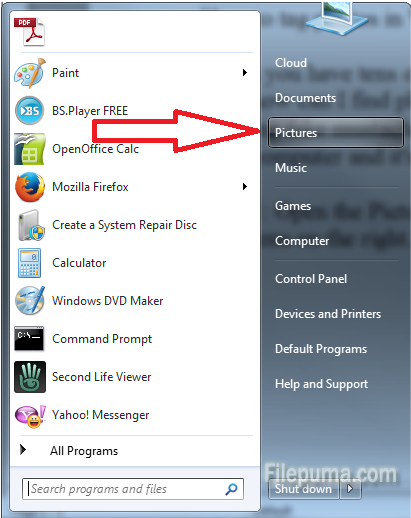
Step 1: Open the Pictures library by clicking the Start button and selecting the Pictures options from the menu on the right. Go in the folder with the pictures you want to tag and organize.
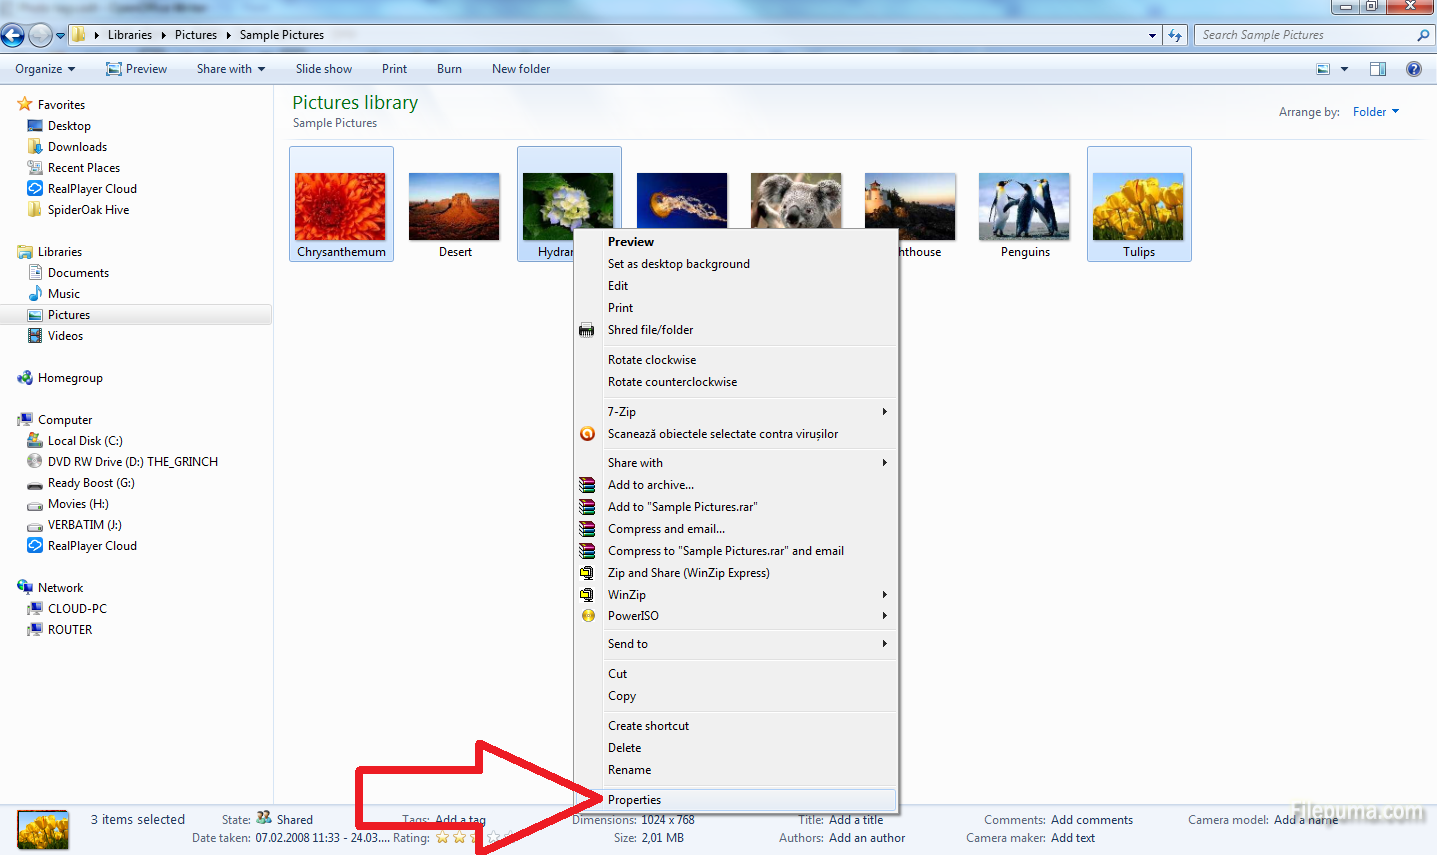
Step 2: Select the photos which you want to tag by holding the Ctrl key pressed and clicking on the photos. Then right click on one of the selected photos and click on the Properties option from the bottom of the menu.
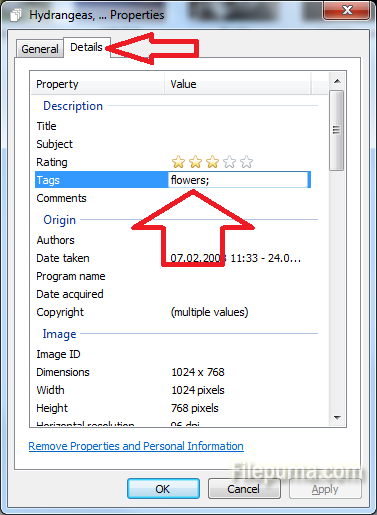
Step 3: Click on the Details tab, then click on the Tags item. A new field will show up, letting you type whatever tags you think that are fit for those photos. In this example I selected three photos with flowers so that would be an appropriate tab for them. I could also tag them with the word nature or wilderness because you can add more tags. On course, you can also tag each photo individually but that could be too time consuming.
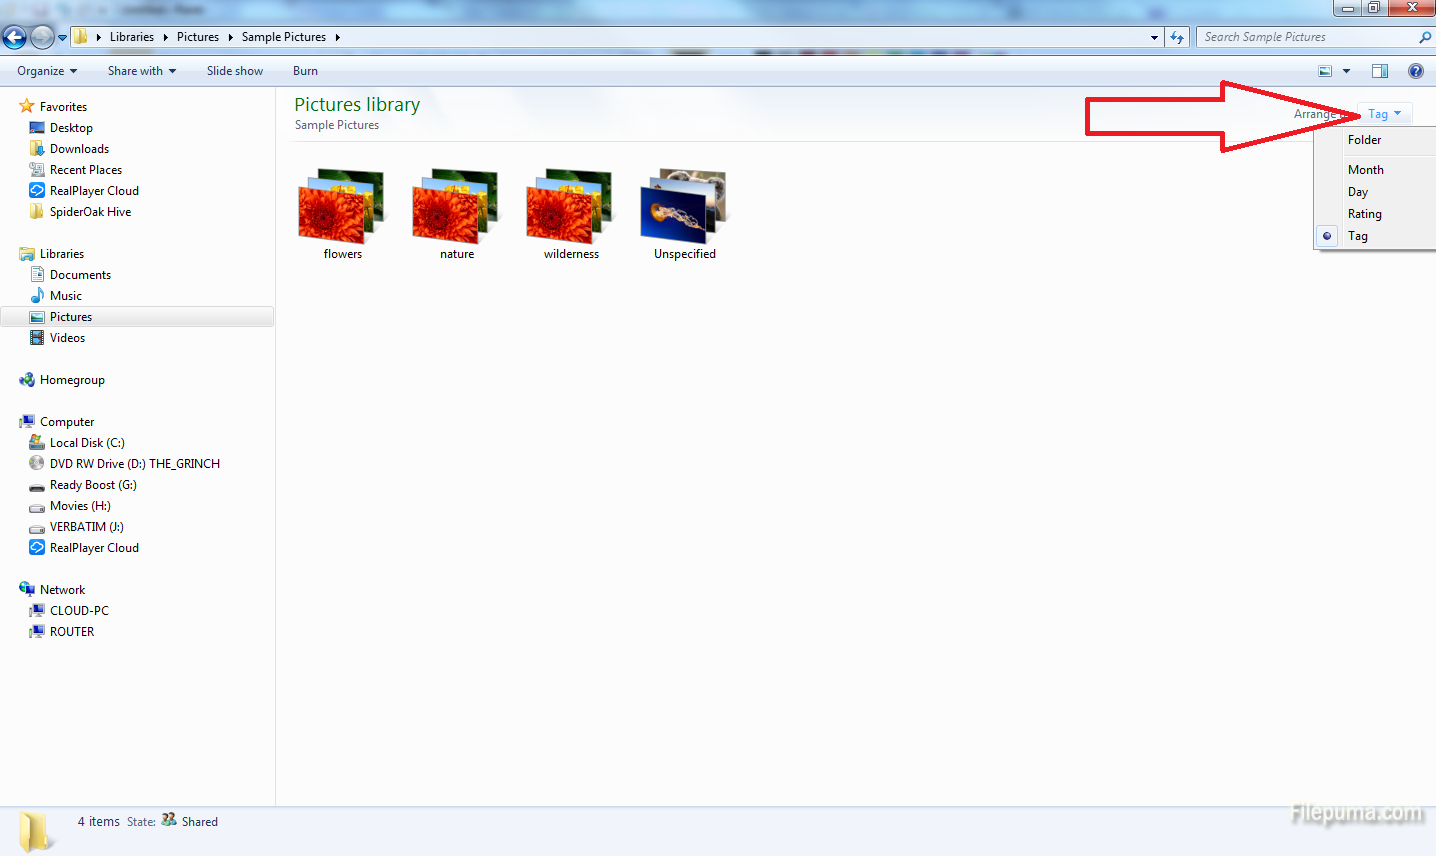
Step: 4: To see the newly organized photos by their tags go back to the Pictures library and click on the button on the right of “Arrange by:” dialogue on the right and select the “Tag” option.