

A cool effect on photos you may want to use is when the edge of the photos fades out into white. Without using Photoshop, you could also add fading to the photos in Microsoft Word. It makes for a nice touch to presentations and documents.
Here is how to fade out the edges of photos in Microsoft Word:
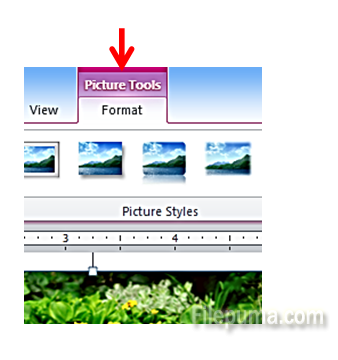
Step One. Open your Microsoft Word document and select the picture you want to fade the edges of. Click on “Format” from the top menu:
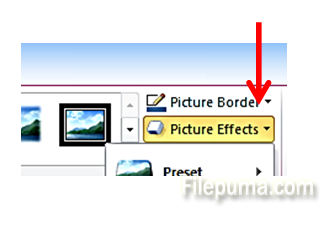
Step Two. Click on the dropdown next to “Picture effects”:
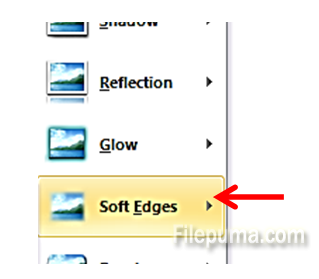
Step Three: Hover the mouse down the menu over “Soft edges”:
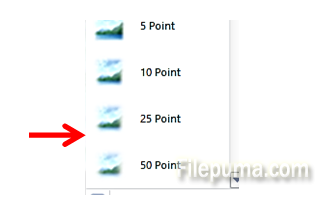
Step Four. From the options which come up on the left side, select the width of how much of the edges you want to fade out. “25 point” is a good starting point:
Step Five. Your picture will now be nicely fading at the edges:

You can always reduce or increase the amount of fading out.