How to Create Non Jagged Shapes

Adobe Photoshop is a great program that gives you the utmost power and creative control for 2D and 3D image manipulation and compositing, video editing, and image analysis. Here is the instruction to tell you how to create non jagged shapes easily with Adobe Photoshop.

1

1. Run Photoshop and create a new document. Set the Height as 600 and Width to 72. Set the Color Mode as “RGB Color” and the Background Contents as “Transparent.” Click “OK.”

2. Press “D” to set the default color as black. Select the “Rectangle Tool” and drag it to draw a large rectangle.

3. Zoom into the image and type “400”, press “Enter.”

4. Select the “Lasso Tool” from the Toolbox. Check the “Anti-Alias” box of the Options Bar. Draw a jigsaw-shaped outline in the box. Press “Ctrl-X” to create a non-jagged shaped piece from the black rectangle.

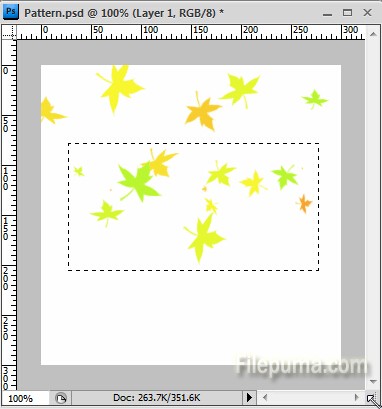
5. Deselect the check box in the options bar and draw another shape beside the one you just drew.

6. Repeat steps one to five above to create an object in a new file.

7. Click “Blur—-Gaussian Blur.” Type “4” in the Radius field and click “OK.”

8. Select the “Adjustments” and click “Levels.” Type “130” “1” “165” in the three text fields. Click “OK.”

How to Make a Transparent EPS in Adobe Photoshop

Photoshop is the professional standard in image editing, used worldwide by people who want to create and edit photos with superior results. You can create an EPS file with a transparent background using Adobe Photoshop. Here is the instruction to tell you how to make a transparent EPS in Adobe Photoshop.

QQ截图20150421155136

1. Open the PSD image or some other type image you want with Adobe Photoshop.

2. Go to the Toolbox, click the “Pen” and then click the “Paths” icon in the top options navigation bar.

3. Draw the intended visible area of the image.

4. Go to “Paths”, click the “Clipping Path” option. Click “OK” to save the new path.

5. Go to “File—- Save As”. Save the file as “Photoshop EPS”.

6. After the saving step, EPS dialog box will open.

7. Click “Preview” from “TIFF (8 bits/pixel)”, then click “ASCII85” for the “Encoding” option. Keep the other options as defaults, and click “OK.”

8. Now you’ve successfully make a transparent EPS document.

How to Draw Vector Swirls on Photoshop

Adobe Photoshop CC is the world’s most advanced digital imaging software, used by photographers, designers, web professionals, and video professionals. You can also create vector graphics, such as swirls, for your digital art. Here is the instruction to tell you how to draw vector swirls on Photoshop with “Pen Tool”.

1
1. Start Photoshop. Click “File—-New” to open a new blank document.

2. Select a color from the color palette. Click the “Brush Tool” and select one “Hard Round” brushes. Select the brush size and set it to 100% opacity.

3. Click and hold the “Pen Tool,” then select “Freeform Pen Tool”.

4. Click on your document begin to draw the swirl shape. Now you’ve successfully create a vector path following the created shape.

5. Right-click, select “Stroke Path,” then click “OK.”

6. Photoshop will draw your vector swirl using the “Hard Round” brush and the color you selected. Right-click and select “Delete Path.” This can remove the path line from your vector image. Repeat this process to draw as many vector swirls as you need.